Setting up mail through Outlook.com
This guide shows the configuration of Mail through Outlook.com and requires you to already have an e-mail account created through our Mail Administration, which you can access in our Dashboard.
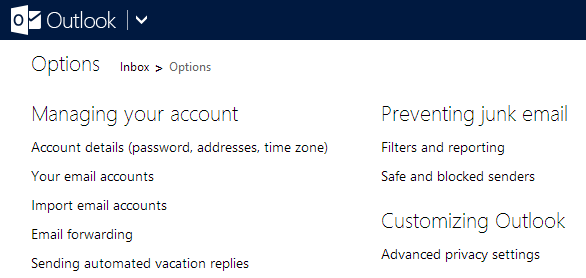
1. Below "Options" choose "Your email accounts".
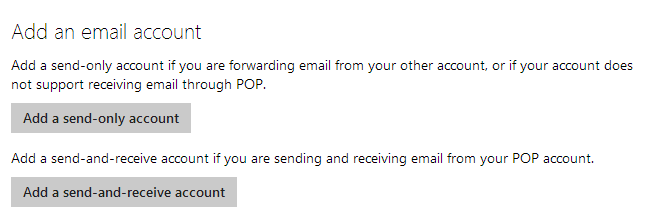
2. Choose "Add a send-and-receive account".
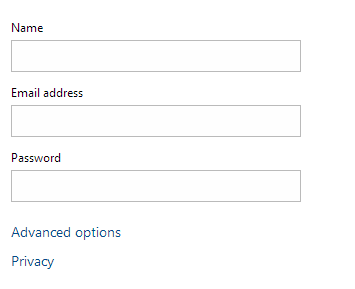
3. Choose "Advanced options" before you specify your information.
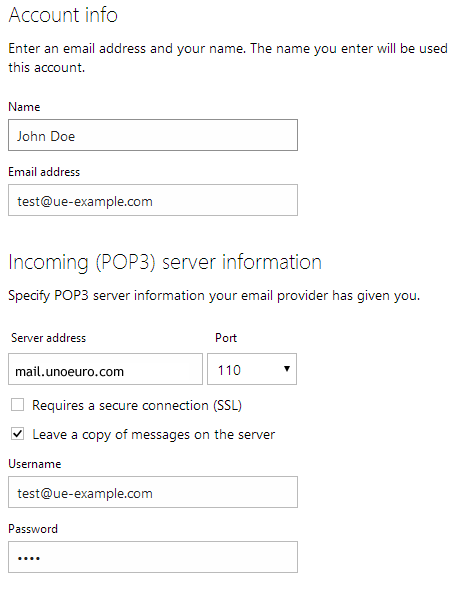
4. Specify your name, mail account and fill out the server settings as shown for the incoming server. You have to replace our example with your own server settings. The correct settings are seen in the product mail we sent to you upon registering your product. The "Username" must be your mail account and as the password you should use the one that you used to create the mail through Mail Administration in our Dashboard.
IMPORTANT: The incoming server must be mail.simply.com
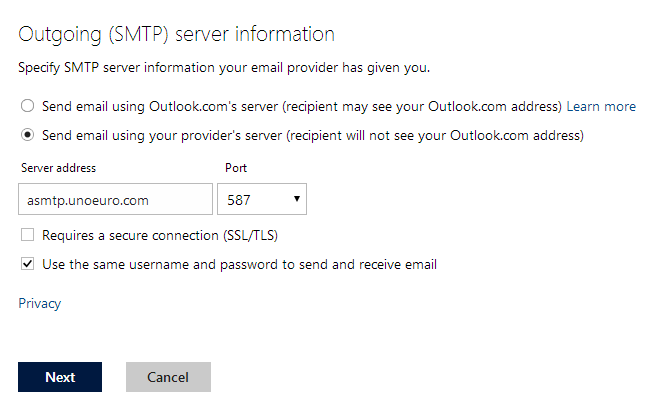
5. Fill in the shown settings for the outgoing server and press "Next".
6. Choose whether the account should have its own inbox and save the configuration. The account has now been created.
Article from the support category: Mail